Expo XT for Teams utilizes the Microsoft Power BI platform. In Power BI, workspaces are collaborative environments where users can create and manage content. Each individual added to a workspace is assigned one of four distinct roles, each with its own set of capabilities and access levels allowing you to optimize your customer service strategy.
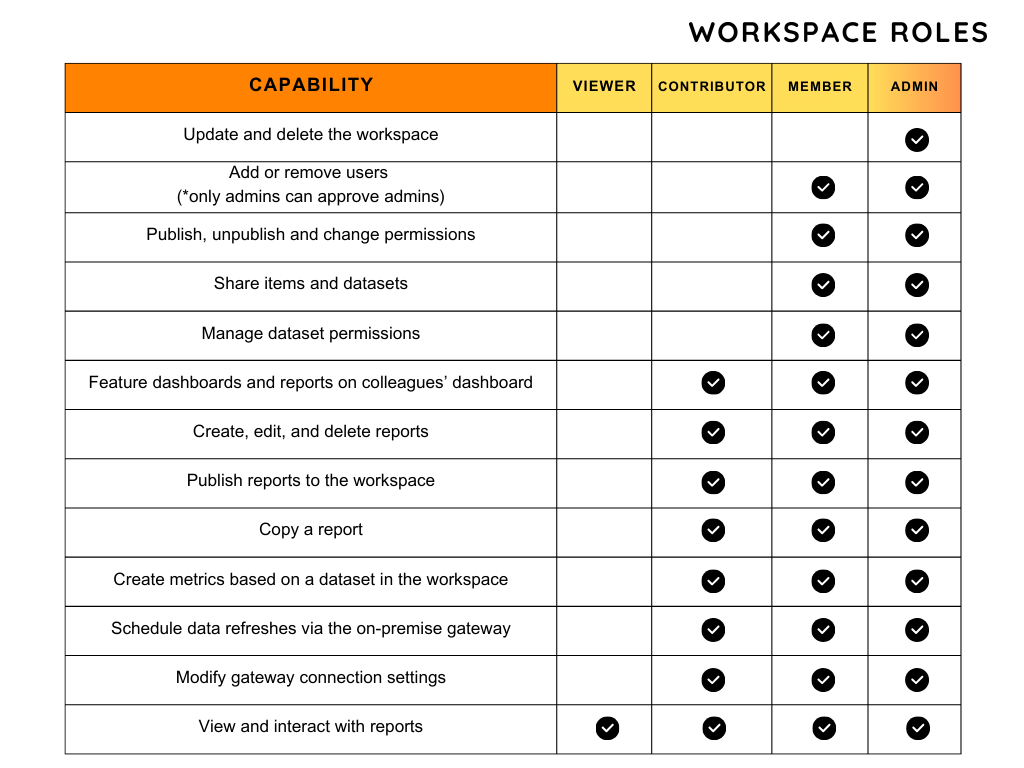
Workspace Roles for Teams Reports
Viewer Role
Users with the Viewer role are granted read-only access. They can see and interact with reports and dashboards but cannot alter content. This role is designed for users who need to consume data without modifying it.
Contributor Role
The Contributor role expands upon the Viewer's permissions. Users in this role can not only view and interact with content but also have the ability to create, edit, or delete reports and dashboards. They can publish reports, manage data refresh schedules, and adjust gateway settings.
Member Role
The Member role expands upon the Contributor's permissions to enable the user to share, publish, change, and interact with reports. They are also to assign and manage other Contributors and Viewers.
Admin Role
The Admin role holds the highest level of access within a Power BI workspace. Users in this role inherit all the capabilities of the other roles and can also manage user access comprehensively, including the addition and removal of any role, even other Admins.
Each role is carefully tailored to match the responsibilities and requirements of different users within your organization, ensuring data security and governance while promoting collaboration
How to Set Permissions in Expo XT
Prerequisites:
- Administrator access to Expo XT
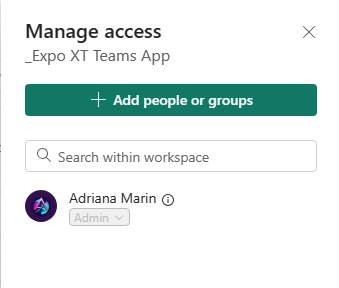
Step 1: Navigate to Expo XT for Teams Workspace
- Locate and select the specific workspace “Expo XT Teams App” where you wish to manage user access.

Step 2: Access Management
- Within the workspace, look for the option labeled Manage Access. This is found in the settings or by clicking on a gear icon.
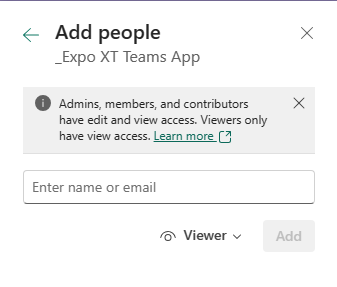
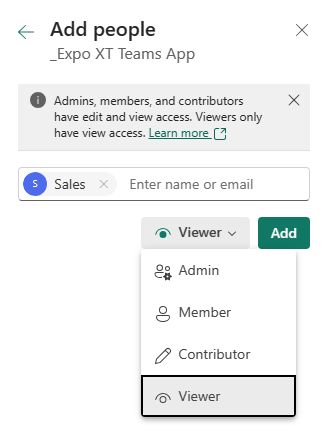
Step 3: Add Users
- Click on Add people or groups to initiate adding new users.
- In the provided field, type the name or email of the individual or group you wish to add.
- Choose the appropriate role from the available options: Viewer, Contributor, Member, or Admin.
- Confirm your selection by clicking Add.
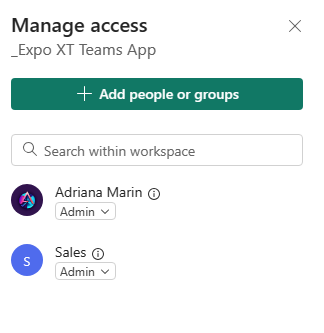
After these steps, the selected users or groups will have the role you assigned, allowing them access to the workspace. Remember that you can host multiple reports within a single workspace or manage several workspaces, each with unique permissions set.
By following this process, you can efficiently manage user roles and ensure that the right individuals have the access they need to collaborate and perform their functions effectively. If any assistance is needed do not hesitate to contact our support team that would be happy to help you.